Archive
Enable AlwaysOn PowerShell
Enable-SqlAlwaysOn -Path SQLSERVER:\SQL\nodename or hostname\instancename -NoServiceRestart
Import Azure SQL Database export file to On-Premises SQL Server
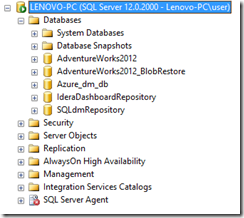
Login to On-Premises SQL Server Instance.
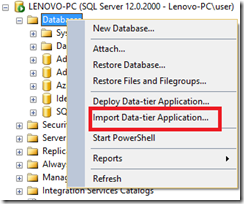
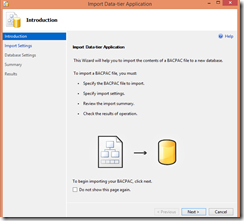
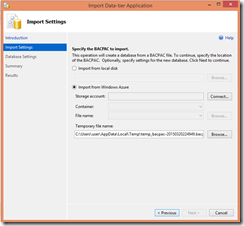
Right Click the Databases Folder and select [Import Data-tier Application]
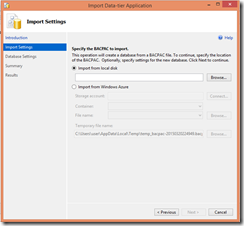
Choose Import from Windows Azure Storage
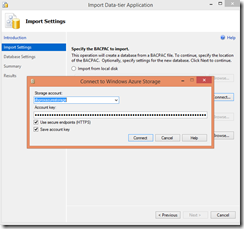
Provide the Storage Account information
Provide the temporary storage location for file to be downloaded.Provide the location which has enough space (.bacpac filesize + 10%)
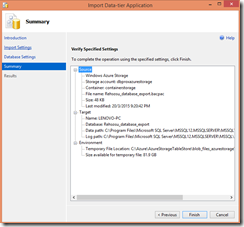
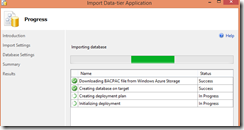
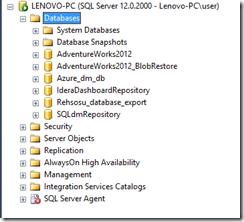
Specify the target Database Name and file locations
Export Azure SQL Database to Azure Storage
You can export the Azure SQL Database using PowerShell , Azure Portal , Visual Studio,SQL Server Management Studio. In this post i have used PowerShell to export the Azure SQL Database to Azure Storage.(You can also export it to you on-premises local storage)
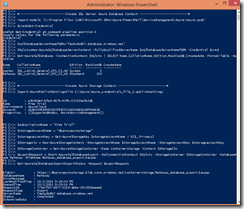
#————————–Create SQL Server Azure Database Context —————————#
import-module ‘C:\Program Files (x86)\Microsoft SDKs\Azure\PowerShell\ServiceManagement\Azure\Azure.psd1’
#—-Provide the sql login and password whose database will be exported—-#
$cred=Get-Credential
$sqlDatabaseServerNameFQDN=’faw5udm867.database.windows.net’
$Sqlctx=New-AzureSqlDatabaseServerContext -FullyQualifiedServerName $sqlDatabaseServerNameFQDN -Credential $cred
Get-AzureSqlDatabase -ConnectionContext $Sqlctx | SELECT Name,CollationName,Edition,MaxSizeGB,Createdate |Format-Table –Autosize
#————————–Create Azure Storage Context —————————#
Import-AzurePublishSettingsFile C:\Azure\Azure_credentials_file_2.publishsettings
$subscriptionName = "Free Trial"
$storageAccountName = "dbproxazurestorage"
$storageaccountkey = Get-AzureStorageKey $storageAccountName | %{$_.Primary}
$StorageContainer = Get-AzureStorageContainer -Name containerstorage -Context $StorageCtx
#————————–Initiate Export —————————#
$exportRequest = Start-AzureSqlDatabaseExport -SqlConnectionContext $Sqlctx -StorageContainer $StorageContainer -DatabaseName Rehsosu –BlobName Rehsosu_database_export.bacpac
#————————–Check Export Status—————————#
Get-AzureSqlDatabaseImportExportStatus -Request $exportRequest
Deploy Database from Azure SQL Database to Azure VM SQL Database
In this post we will go-over on how to move the Azure SQL Database to Azure VM SQL Database. You cannot backup the the Azure SQL Database by issuing Backup Database Command on version
[Microsoft SQL Azure (RTM) – 11.0.9230.80 Mar 10 2015 12:37:14 Copyright (c) Microsoft Corporation]
it will prompt the below error
Msg 40510, Level 16, State 1, Line 1
Statement ‘BACKUP DATABASE’ is not supported in this version of SQL Server.
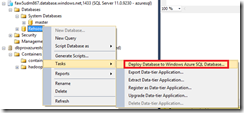
To quickly deploy the database from Azure SQL Database Server to Azure VM SQL Database Server i used [Deploy SQL Database to Windows Azure Database] Wizard from On-Premises SQL Server Management Studio. (Note: If the firewall rules are not opened to connect to Source and destination from On-premises firewall the wizard will fail to connect and deploy)
Connecting Azure SQL Database using PowerShell
In this post we will connect Azure SQL Database using PowerShell.
I assume that you have a Azure Database Created using Azure Portal and the login information which was provided at the time of database creation.
Import Azure PowerShell Module.
import-module ‘C:\Program Files (x86)\Microsoft SDKs\Azure\PowerShell\ServiceManagement\Azure\Azure.psd1’
Azure SQL Database can only be accessed using SQL Server Authentication
#Create Azure SQL Database server connection context
# Define a SQL Database server credential – Specify the username, and password in the Popup dialog
$cred=Get-Credential
$sqlDatabaseServerNameFQDN=’faw5udm867.database.windows.net’
$ctx=New-AzureSqlDatabaseServerContext -FullyQualifiedServerName $sqlDatabaseServerNameFQDN -Credential $cred
Get-AzureSqlDatabase -ConnectionContext $ctx | SELECT Name,CollationName,Edition,MaxSizeGB,Createdate |Format-Table
Connecting Azure SQL Database using SQL Server Management Studio
There are multiple ways of connecting Azure SQL Server
- Connect by SQL Server Name
- Connect by URL
- Connect by FQDN
Connect by server name require you host name configuration changes at your end or you should have your VPC / VPN .You can read more here on the guidelines for Connecting to Azure SQL Database.
In this post we will see how to connect Azure SQL Database using SQL Server Management Studio and PowerShell.
I assume that you have a Azure Database Created using Azure Portal and the login information which was provided at the time of database creation.
Click on the database , it will take you to the database information page, here you will see [Connect to your database] and the Server details.
Copy the Server Information (Server: faw5udm867.database.windows.net,1433)
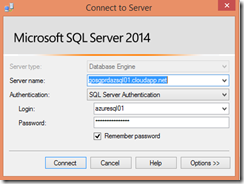
open SQL Server Management Studio and pass the details as below. You may get Error while connecting for the first time which is to allow access to you IP Address.
To get you IP Address added to the Azure firewall rule follow the below steps on Azure Portal.
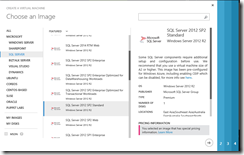
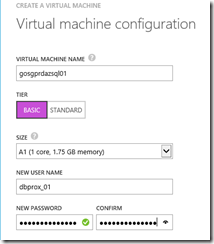
Creating Azure VM + SQL Server
AWS S3 Storage – Access S3 Storage On-Premesis using TntDrive Tool
Recently i have been asked by one of my client on how can i use my AWS S3 Storage Bucket to uploaded / download or directly write to the bucket from local PC without using AWS console or Storage Gateway.
To provide S3 Storages available directly attached to your system (Writes to local system in temp folder and queue it to load slowly) , there are couple of tools available. In this post i will show on using Tntdrive to attach my S3 storage bucket as Network or Removable Drive under Windows.
Tntdrive is not expensive.For Licensing please visit Tntdrive
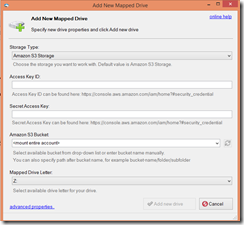
Download and install Tntdrive. Open Tntdrive and click ![]()
Provide you Access Key ID,Secret Access Key and choose the bucket.Provide the Drive Name.At the bottom you will see ![]() .Click it
.Click it
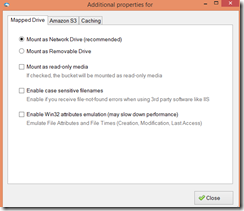
You can choose option as
Navigate to Amazon S3 Storage. I have opted for both the option as it was the requirement.
Caching Tab has multiple options to choose , I used it as default
Once you click OK , you will see the bucket mapped to drive.
In the Drive explorer
Now lets see how can i used it.
Copy the files directly to the bucket and it will be queued for upload, you can see the progress by clicking Queue : Tasks
You can directly copy the files from the Bucket Network Drive. If you have uploaded the databases backups, I will suggest you to directly restore it over the network.
AWS S3 Storage – Access S3 Storage On-Premesis
There are couple of ways provided to access S3 Storage On Premesis. To access S3 Storage on-premises you need to configure Storage Gateways.There are 2 ways to do so
Gateway-Cached volumes: Maintain local, low-latency access to your most recently accessed data while storing all your data in Amazon S3.
You will need a host in your datacenter to deploy the gateway virtual machine (VM). Pick a host that meets these minimum requirements.
This support to virtualization technology Windows Hyper-V and VMware.
You have to download the Virtual machine provided by Amazon AWS which is created for this purpose only.You need to import the virtual machine on Hyper-V or VMWare ESX.
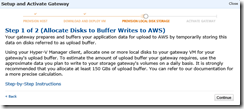
Your gateway prepares and buffers your application data for upload to AWS by temporarily storing this data on disks referred to as upload buffer.
Using your Hyper-V Manager client, allocate one or more local disks to your gateway VM for your gateway’s upload buffer. To estimate the amount of upload buffer your gateway requires, use the approximate data you plan to write to your storage gateway’s volumes on a daily basis. It is strongly recommended that you allocate at least 150 GBs of upload buffer.
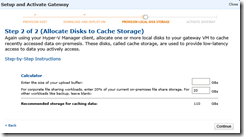
Again using your Hyper-V Manager client, allocate one or more local disks to your gateway VM to cache recently accessed data on-premesis. These disks, called cache storage, are used to provide low-latency access to data you actively access.
Gateway-Stored Volumes: Schedule off-site backups to Amazon S3 for your on-premises data.
AWS S3 Storage – PowerShell – Part-1
To manage AWS services and resources ,AWS has provided AWS Tools for Windows PowerShell.Using this you can manage your AWS services / Resources.
In this post we will go-over on how to connect AWS S3 Storage / Create/Manage/Delete Buckets using Windows PowerShell?
Before we start a little information about WHAT IS AWS S3 ?
The 3 S stands for (Simple Storage Service), this service in short provides businesses/developers/and technology enthusiast to secure,durable,highly-scalable object storage.
S3 is pretty each to use , if you just want to use S3 services to upload and download data you don’t need know any programming language , you can do this with few simple clicks.
In case you want to provide your stored data to be seen / downloaded by your clients you can easily do it in few click (choose the folder and click Actions—>Make Public).
With Amazon S3, you pay only for the storage you actually use. There is no minimum fee and no setup cost.
I you have not downloaded AWS Tools for Windows PowerShell flow the post to do so.
To Start you can use AWS provided PowerShell console or you can use the windows PowerShell console.
AWS Console is preconfigured to use AWSPowerShell Module / with windows PowerShell Console you can Import the AWS Module
Import-Module “C:\Program Files (x86)\AWS Tools\PowerShell\AWSPowerShell\AWSPowerShell.psd1”
Initialize the [Initialize-AWSDefaults]
Lets start .
- Open PowerShell and Import the AWS PowerShell Module
- Once you have created the AWS Profile Initialize-AWSDefaults will by default chose the same profile.
Now see how many Buckets you have associate to your S3 Storage
If there are no S3 Buckets , lets create one
- New-S3Bucket -BucketName dbproximagebucket


- To create Folder / Directory in a Bucket there are no PowerShell Commands at present. But , We can do it by creating a empty folder on local computer with a text file and upload it to the S3 Bucket, while uploading you have to pass the KeyPrefix parameter which is actually a foldername under the bucket.Recurse will uploaded all the subfolders and filesWrite-S3Object -BucketName dbproximagebucket -KeyPrefix Imagesdbprox -Folder “C:\Upload _To_S3Bucket” –Recurse
- List out what we got in S3 Storage Bucket
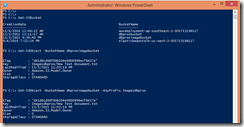
As you can see in the above image i have just one folder with a text file, lets upload some data within folders and subfoldersGet-S3Object -BucketName dbproximagebucket | select Key,Size
-BucketName : This is our main bucket in which all the data is uploaded.
The output column Key holds the full path of the file
ProjectFiles (Root Folder inside the bucket)/Top10 Hotels(Subfolder inside the root Folder)/Capella_Hotels.jpg (file inside the subfolder)
- Let uploaded the folder /subfolder / files inside a Root folderThe folder Imagesdbprox already existed , we moved couple of folder/subfolder/files in it.
Upload files in a Bucket
Write-S3Object -BucketName dbproximagebucket -KeyPrefix ProjectFiles -Folder “H:\SingaporeProject\Images\GoSinga
porePics\Hotels” -Recurse
Upload files in a Bucket Folder
Write-S3Object -BucketName dbproximagebucket -KeyPrefix Imagesdbprox -Folder “H:\SingaporeProject\Images\GoSing
orePics\Hotels” -Recurse
Get-S3Object -BucketName dbproximagebucket
Get-S3Object -BucketName dbproximagebucket | select Key,Size
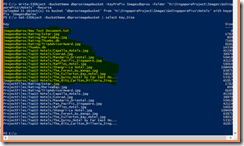
List out folder/files with in a root folder
Get-S3Object -BucketName dbproximagebucket -KeyPrefix Imagesdbprox | select Key,Size
List out files in a folder\subfolder
Get-S3Object -BucketName dbproximagebucket -KeyPrefix “Imagesdbprox/Top10 Hotels” | select Key,Size
Delete the Bucket / Bucket with content
If the Bucket is not empty , you will receive below error
Remove-S3Bucket -BucketName dbproximagebucket
Delete the Bucket with content
Remove-S3Bucket -BucketName dbproximagebucket –DeleteBucketContent
